

You can use up to 3 different providers as source for m3u lists. Channels selected on each list will be merged onto a single output m3u list.
1.1 Provider link information
Optional. Enter the link to the m3u file your provider gave you in the input field. Then click on "Get .m3u" button to download the m3u file.
-
Notes:
- the link will need the following text '&type=m3u_plus' to receive group-title information from your provider.
- the link will be saved in your browser and displayed the subsequent times you log in.
- depending on the web browser you use, if the provider link is 'unsecured' (ie. http and not https), the download might not work. You will have to manually copy the link to a new browser window to download the file.

Once you have the .m3u (or .m3u8, .ts) file on your PC, Click 'Upload File' button to upload it to the server.
-
Notes:
- the file must not be over 300MB.
- Ex. of channel definition: #EXTINF:-1 tvg-id="France4.fr" tvg-name>="FRANCE 4" tvg-logo="https://domain/fr/France4.fr.png" group-title="|EU| FRANCE",FRANCE 4 http://domain:8000/xxxxxx/xxxxxxx/xxxxx
Upon uploading your file, the groups it contains will be presented in an ordered list. See figure 4.
You can now select the groups you want by clicking the checkbox.
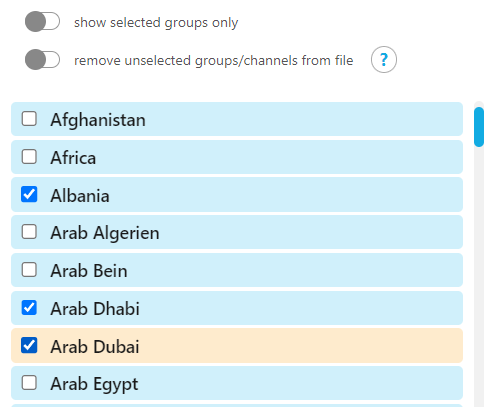
Only the groups you have selected will be shown in the list.
remove unselected groups/channels from fileAll groups (and their channels) not selected will be removed from the file on the server. This way requests will take less time to execute.
Later on if you want to retrieve them, you will need to upload the file to the server again.
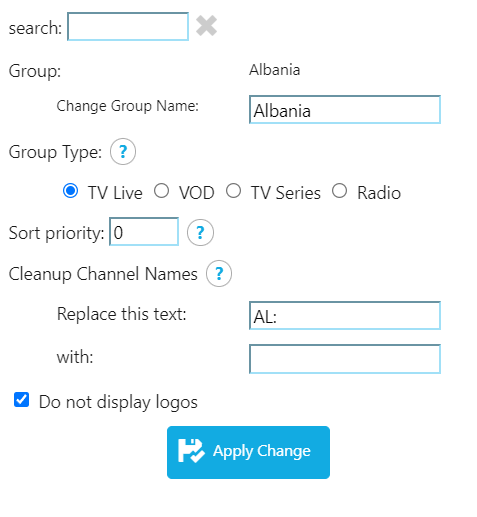
Figure 4b shows settings and actions that apply to groups.
search for channels in the current group.
Change group name:Change group name.
Group type:To use the new Media features in Kodi v.20+, you need to specify the type of content.
Media Types:
- TV Live: Default.
- VOD: Channels are moved to Recordings/Movies/.
- TV Series: Channels are moved to Recordings/TV Shows/<tv serie>/<season>/.
- Radio: Channels are moved to radio group in Kodi.
TMDB
Groups set to VOD (movies) and TV Series will have access to TMDB metadata. See section 1.5.
If needed, channel name must be cleaned from extra information. Ex: '|FR| Iron man' will not work as is. '|FR|' must be removed using 'Cleanup Channel Names' section.
By default, some information is automatically removed, i.e. HD, 4K, FHD, 3D, year ex. (2023), season ex. S01.
Sort priority:Set group's sorting priority level. Groups with higher values will come out before in your list.
Note: Custom groups have level 4 sorting priority.
Cleanup channel names:- Enter characters you want to replace from channel names.
- Leave 'With' field blank to remove characters.
-
You can enter multiple sets of characters separated by a semicolon ';'
ex: '|DE|;(MULTI)' -
Regular expressions (limited) can be used.
ex: AS001, AS002, ... can be removed using 'AS\d*' or 'AS\d{3}'
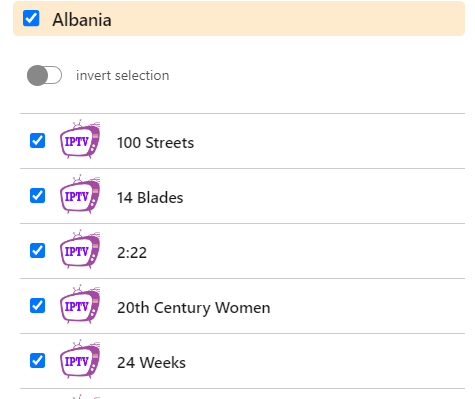
By default all channels within groups are selected (figure 5). You can unselect the channels you do not want or, if you only want a small subset of the channels, you can click the 'invert selection' button and then select channels you're interested in.

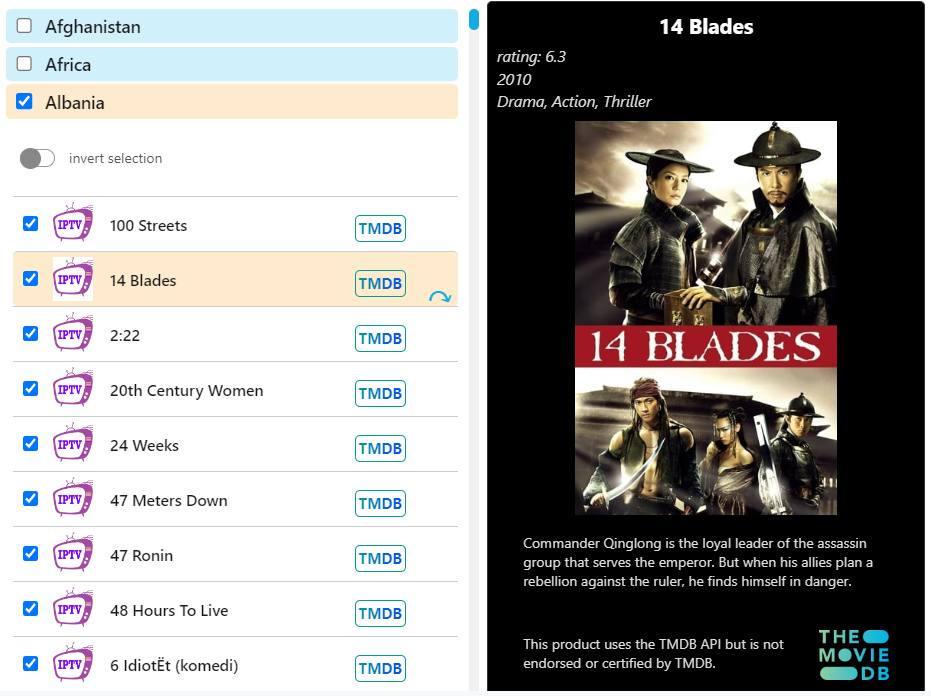
When you click on a channel, some edition options are available (figure 5b)
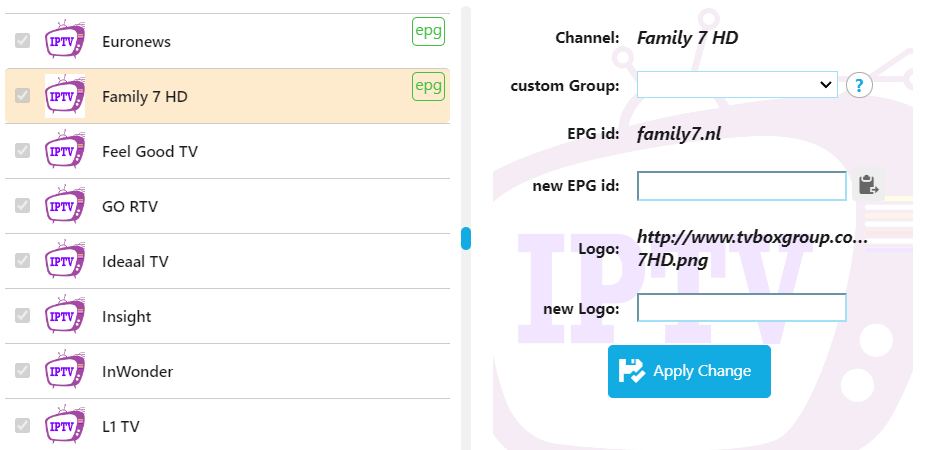
Custom Group:Copy the channel to a custom group. An arrow ↷ appears on the right end when a channel is copied to a custom group. Works even if the group and/or channel is not selected. More on custom groups in section 4.
EPG id:
Lets you enter a new EPG id for the channel.
Must be the same id as the one specified inside xmltv file.
ex: <channel id="RTS1.fr">. More on EPG in section 3.
Lets you change url location for the channel's logo.
1.5 TMDBFor groups with type VOD or TV Series, a button is displayed on each channel TMDB
Clicking this button, metadata is retrieved from TMDB site.
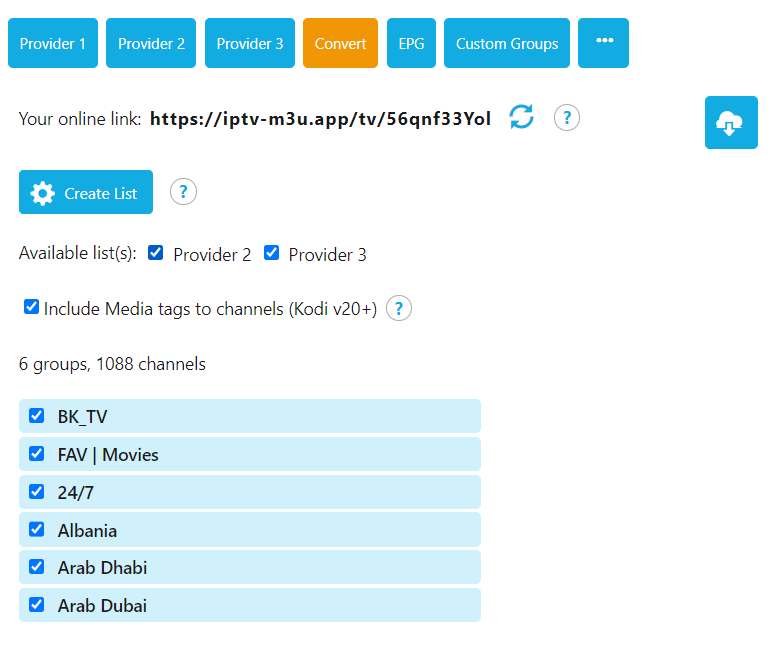
Your personal link is shown at top. Enter this link into the iptv player you want to use.
Click 'Create List' button to build your custom m3u list based on provider list(s) you have uploaded to the server.
Optional. Click 'Download List' button (top right) to download your custom m3u file to your PC. Place this file on your streaming devices or on your network.
3. Electronic Programming Guide (EPG)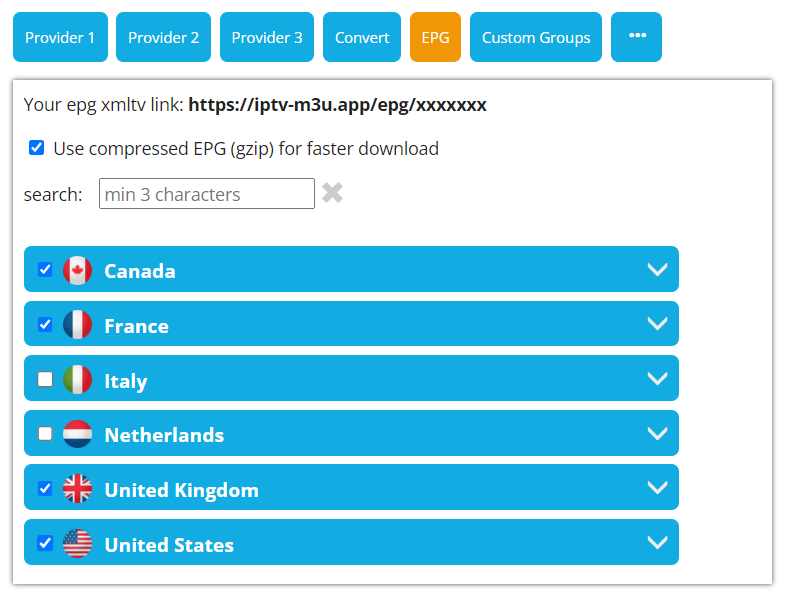
The EPG tab gives you a personal link for xmltv epg guide containing hundreds of channels.
-
Notes:
- Select EPG for each country you're interested in by clicking the checkboxes.
- Use compressed EPG for a much faster download time (if it works with your iptv player).
- You can browse channels by country or search by name.
- Do not share this link, it has a limited monthly amount of downloads.
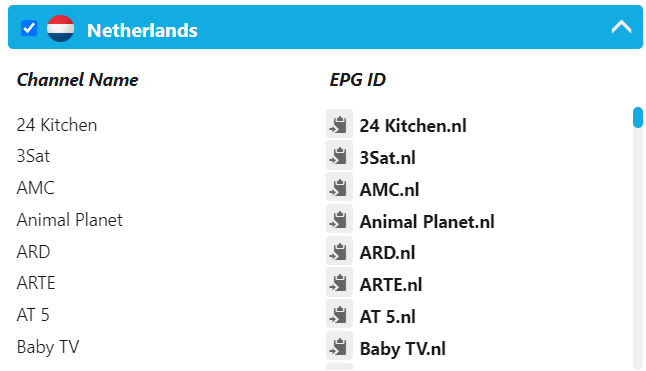
EPG id : for channels to retrieve guide information, it must be the same epg id in your provider list. You can edit this value from your provider list (see section 1.4).
epg appears when the system finds a matching EPG id. See figure 11.
Select the text and press CTRL+C to copy it the clipboard or use button next to it.
If you are using another source for your EPG, you will probably need to change some epg ids. To know what value is needed, open the xmltv file (.xml) in a text editor and search for 'channel id' you need.
Here's an example of xmltv data:
                ...

                <channel id="SuperChannel1.ca"><display-name lang="en">Super Channel 1</display-name><url>http://www.somesite.com</url></channel>

                <channel id="SuperChannel2.ca"><display-name lang="en">Super Channel 2</display-name><url>http://www.somesite.com</url></channel>

                ...
In this tab, you can add custom groups you need. By default, some groups are already available.
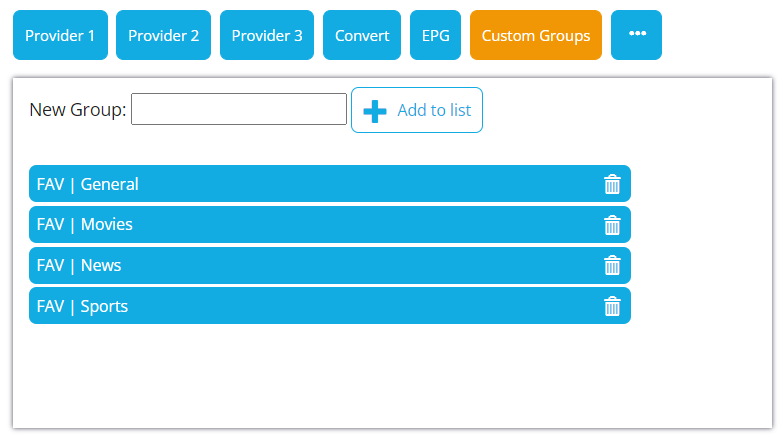
Custom groups will be shown in dropdown list (figure 11).
You have the option to delete any file you have on the server.
You can select a different theme.
